Sunday 31 May 2020

31.05.2020 Vortex Razor 85mm and its exit pupils.

~~~

The human eye has a pupil size depending on age and the brightness of the surroundings. In daylight that might be only 3mm. This sets a lower limit on the power of telescopes.  Go too low and most of the expensive, objective aperture is literally thrown away! Unless, of course, you increase the power to match the telescope's exit pupil to your own.

Elderly people have smaller pupils so greater aperture is a mixed blessing during daylight hours. The light passing through the telescope will also affect your pupil size.

So, is the huge eye lens of the Vortex simply a styling fetish to trap the unwary buyer? It seems that large eye lenses are more forgiving of poor eye alignment with the eyepiece. It avoids dark patches in the image [due to eye misalignment] and allows a larger field of view. So nothing to criticize there. Some "high end" binoculars have 24mm eye lenses.

How useful is that relatively large, 85mm aperture, to anybody but the very young 'scoping at dusk?

Aperture/Magnification = telescope exit pupil.

85/27x = 3mm, 85/40x = 2mm, 85/50x = 1.7mm, 85/60x = 1.4mm.

That looks fine. At the lowest power of 27x the telescope matches an average daylight human pupil. So the full aperture is still utilized.

The elderly buying 7x50 binoculars are wasting their time and money. Their pupil will never match the 7mm exit pupil even in the pitch black of a cave! 10x40 makes far more sense. Though some prefer 8x40 for the lower power simply to avoid the risk of shaky hands. Bino clamps are available to allow the binocular to be tripod or or monopod mounted for stability.

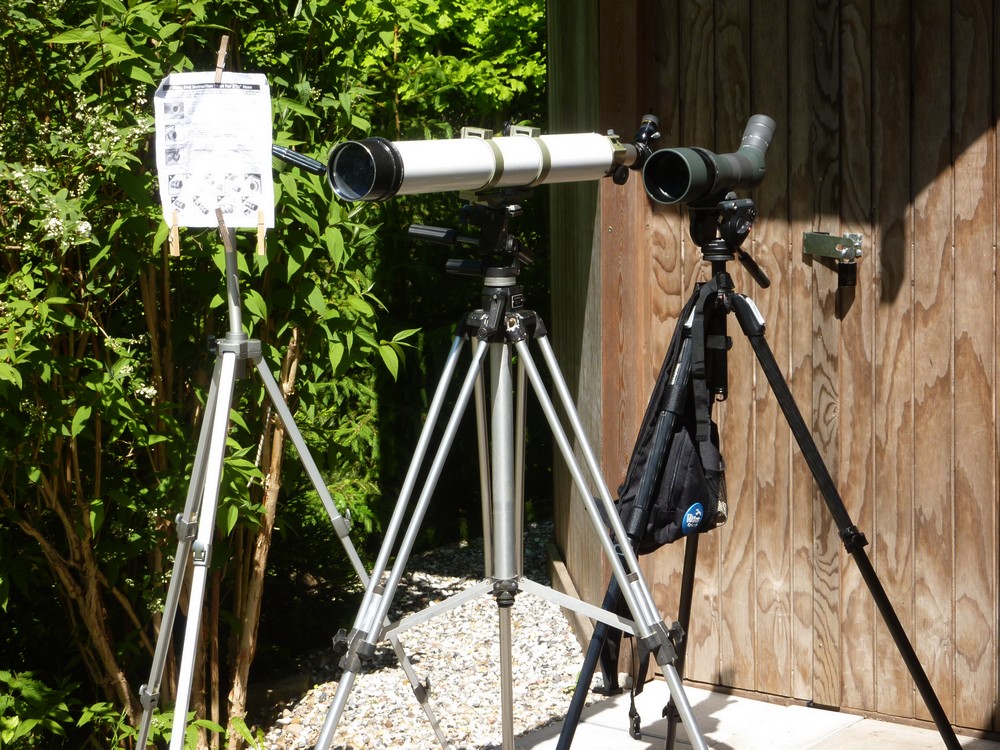
It is quite shocking how stabilizing a binocular will increase the detail which is visible. The detail is always there, but denied by one's inability to hold the binocular or telescope [image] perfectly still.

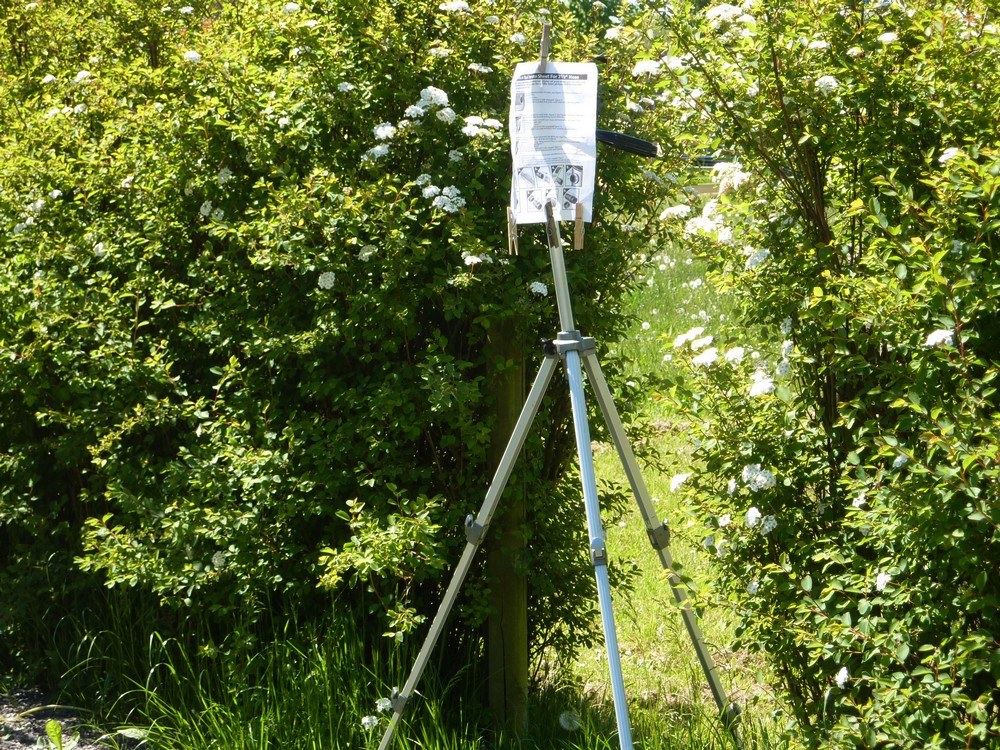
Try using a post or field gate for greater stability if one is nearby. The more distant a subject the steadier the binocular needs to be. The magnification acts like a huge optical lever. The longer the lever, the more the subject moves to the slightest shake of the hands!

Only at night, while looking at a dark sky with dim objects, will one need a larger exit pupil. Providing one is young enough to use it. The moon is bright though a telescope so the human eye pupil will not expand just because the sky is dark.

A wide angle eyepiece helps to give the impression that you are immersed in the view. Binoculars even more so. Smaller fields of view are more like looking at the view through a narrow tube.


~~ 

31.05.2020 Vortex Razor image quality.

~~

Sunday 31st. I was surprised, last night, when I was capturing stills and videos of the moon through the Vortex. Typically, for this time of year, the sky was still pale blue even though it was getting quite dark. The sun was well below the horizon by then but the sky hardly gets fully dark only a few, short weeks from the Longest Day.

My own view through the telescope of the Moon was actually quite pleasing for the very first time. Lots of lunar detail in the way of large and small craters. Though it lacked that "etched" look it really wasn't too bad at all. 

Usually, with an astro telescope, or binoculars of any quality, the detail is so mind blowing that you can't take it all in. It looks like that completely overblown, LG 4K OLED TV picture of a city at night. The deeper you look the more rewarding it becomes. Like fractal images which literally go on forever. Every crater has another crater inside the last. A visual Russian nested dolls situation, if you like. The Vortex Razor lacked that "special" quality. Which I find puzzling.

Despite the telescope and camera sitting on a rigid tripod in still conditions the images and videos still looked very washed out. As if light were leaking in from the sides. That had me thinking about possible causes:

The Razor's eye lens is huge in diameter. Could the moon and sky light be bouncing back and forth between my eye and the eye lens? Could the sky light be leaking in all around the sides of the huge lens ring? 

My Canon Ixus 117HS lens housing is absolutely ludicrously, chrome plated. Now imagine all that light flooding through the telescope and bursting out of the huge eye lens.

Where is it all going to go? It can't all be sucked in though the small camera lens like a black hole. So lots of light is going to be scattered back and forth between the huge eye lens and the chromed Ixus lens housing. 

The PS-100 system I eventually put together is light proof to the outside world. The nose of the camera lens is deliberately placed close to the telescope's eye lens. This is primarily to reduce vignetting. [Dark corners in the image.] I covered the open end of the Vortex eyepiece with the
camera switched on. There was no visible light leaking in anywhere.

The camera lens is hidden deep inside the huge adapter "cup" which fits over the Vortex rubber eyepiece ring. The picture shows the black packing strip I needed to match the two diameters. [57-61mm: Eyepiece and adapter ring.] The black, self adhesive strip must help to exclude external light.

The Moon's washed out appearance is a worry. It greatly reduces contrast. The huge eyepiece doesn't lend itself readily to conventional shielding with a "winged" light excluder.

My astro eyepieces did not suffer to the same extent while viewing the moon in broad daylight. They did not have the usual light excluders either. These eyepieces were roughly half the diameter of the Vortex. With the eye lenses sunken inside a tube.

The Vortex' is almost on the surface of the eye ring. This must increase its vulnerability. Though the outer rubber ring can be twisted up and down, to cater for spectacle wearers, it rarely stays still for long. The only way to keep it from rotating freely would be to tape it to the body! When raised, it must greatly improve light exclusion. Though not for the camera. Which demands the ring be fully lowered. The rubber ring has locking system but it is far too loose to be useful. There doesn't seem to be any means of adjustment when the outer rubber ring is removed.

I am going to try a black, felt ring to cover the Canon lens' shiny nose before I paint it matt black. Just to see if it stops multiple reflections between the shiny camera nose and eyepieces lenses. How I can do that for my own eye is another matter. Is my eye lit up by the  bright light exiting the huge eye lens and reflecting back and forth? It seems highly unlikely given the almost spherical shape of the human eye.

Or is it just the skylight leaking in all around my eye socket? That should be improved by gluing a black felt ring to the rubber ring around the Razor's eye lens. Even if it doesn't seal against skylight it will help to cut it down.

Or, I can easily experiment by covering my head with a black [shade] cloth while looking at the Moon in daylight.I added a crudely cut gasket of black rubber to reduce all risk of light intrusion.

Adjusting the camra back and forth on the telescope adapter produces some weird effects.


~~ 

Saturday 30 May 2020

30.05.2020 Vixen 90mm v Vortex Razor 85mm. Pt.4. Binoviewing! 😎

~~~

Saturday afternoon. 70F. A glorious summer's day without being too hot. Though it was surprisingly warm standing about in the sunshine. I dragged both telescopes along to the gate. The usual A4 target was placed at the far end of the drive at 64 meters [70 yards] away. 

Yet again it was a close match as I compared both 'scopes at 50x. The seeing was best when the wind blew and the sun hid behind the few clouds. I was able to read the title at intervals and the bold heading. The latter with considerable difficulty. The normal text was just too small and soft to read clearly. The Vixen nudged out the Vortex Razor but there was very little in it.
 
I was fiddling with the Vortex zoom eyepiece. Trying to discover why it was often so loath to come out of its socket. A little reverse motion helps. Rather than trying to lift it straight out at "full turn."

Then I discovered that the Vortex has an eyepiece socket just larger than standard 1.25" astronomical eyepieces. I set the Razor zoom EP safely aside and went through my range of Meade 4000 at my disposal. 40, 32, 26 and 20mm all provided bright, sharp and clear images. Great!

Then it occurred to me that my T-S 1.25" binoviewer would fit the socket too. The problem was reaching inward focus. A common problem even with astro telescopes. So we can't beat the Vortex Razor about the head for having the same issue. Besides, it was never meant to have normal eyepieces inserted into its receptacle. 

A stroke of genius by the designer, if you ask me. It certainly opens up a wealth of new possibilities without actually advertising the fact in bold headlines. You can have binocular vision via the Vortex Razor, with variable power at relatively low cost.

A binoviewer is like a binocular body but with only the special prisms. No objectives or eyepieces. A single nosepiece fits the telescope eyepiece socket. You have to buy your own, matching pairs of eyepieces depending on your pocket. They go from about £10 each to £1k. Some are extreme wide angle. Which helps to give an immersive effect. There are even zoom eyepieces.

It took the TS 2.6x GPC [Glass Path Corrector] to reach inward focus with the TS [Telescope-Service] binoviewer in the Vortex Razor. Once that was established I tried my 40mm, 32mm, 26mm and 20mm pairs of Meade Plossls. The results were excellent just looking around the sunlit trees in the garden at up to 40 meters away. 

Further away the trees were subject to mirage. [Wavy thermal air currents from the sun-heated ground heating the air] I returned to the familiar twig on top of tree at 500 yards to my south. [Measured on Google Earth] The binoviewer made it easier to examine the 4-5" high, bent pencil of a twig at 500 yards. 

I was careful to examine the Vortex eyepiece socket first before experimenting with these different eyepieces. There is no danger of damaging the optics. A solid metal ring forms the bottom of the eyepiece socket in the telescope body. With quite a small aperture protecting the first visible, glass, optical surface. Well out of reach unless you shove slender objects down there! A standard eyepiece spigot won't do any harm and will sit on the base ring.

The Vortex socket is complicated by having a bayonet and locking system. Fortunately this is unaffected by 1.25" fittings. Being undersized [in diameter] they slide right past without noticing the protrusions. Turning the eyepiece locking ring had no discernible effect.

NOTE: The 1.25" eyepiece fit is decidedly sloppy! Which means great care is needed to avoid tipping the telescope back too far. Allowing the eyepiece or expensive binoviewer to literally fall out! A 45 degree bent spotting scope helps here. Until you tip it back to look at the moon high overhead!

NB: I wouldn't go wrapping electrical tape around the eyepiece spigot or it might jam in the Vortex bayonet system. I'll leave it to you to decide if a wrap of thin metal is in your stars. Just don't blame me if you break your expensive telescope!! Or eyepieces!

Still image of the moon captured through the Vortex Razor 85mm with my Ixus117HS. I have darkened and sharpened the image in PhotoFiltre7. The original was pale, soft and rather washed out. [See below] As were the videos I captured.

It should be said that there is a vast range of eyepieces available intended for astronomy. The Meade 4000 series are very middle of the road when it comes to image quality and modest field of view. They just happen to be popular and easy to find secondhand when you need more. Like four,
matching pairs for binoviewers. 

The moon is already climbing in the east and always a superb target for any optics. The detail is as small as you could possibly wish for. Totally regardless of the size and quality of your optics. I found the Vortex Razor zoom EP view was washed out last night until the sky was much darker. At this time of year that is remarkably late at 55N. Nevertheless, I shall be trying single astro eyepieces and the binoviewer later on. See images above.

 ~~

30.05.2020 Vixen 90mm v Vortex Razor 85mm. Pt.3.

 ~~

Vortex claims to have a "unique, VIP, no questions asked, replacement guarantee."

The Vortex dealer tells me that my battered old Vixen achromat is bound to be better than a £1400, brand new, terrestrial, APO, ED, HD  [whatever] spotting scope. Simply because it has a longer focal length and simpler eyepieces. They have asked that I return the telescope to the UK for [possible] repair if I still think it is faulty.

I have had the Vortex Razor 85mm for just over a month and it has been a real struggle to ignore its mechanical and image faults. Soft images and violet or blue, false colours at higher powers.

Mechanical:

Ridiculously loose eyepiece rubber ring never stays in place.
Very stiff zoom collar.
Impossibly stiff eyepiece locking ring is very awkwardly placed. Causes broken nails!
The eyepiece frequently refuses to come out of the body.

The stay-on bag is quite simply garbage:
The ridiculous, elasticated lens bags have plastic buckles.Which can easily be trapped and damage the optics!
The bag denies the user access for retracting or extending the sun shield.
I denies the user access to the eyepiece locking ring for eyepiece removal.
It rotates randomly around the body. Making fitting and release from the tripod ridiculously difficult.

The plastic lens caps fall off all the time. Strictly shop display only.
The ridiculously heavy, rubber objective cap is all but impossible to fit and remove.
No lanyard. So where do you keep it when not in use?

Image faults:

Violet wash at higher powers. Dark twigs appear violet against the sky.
Only bright and sharp at lowest power 27x.
Softer at higher powers.
Can't match an elderly and battered 90mm achromat.
Washed out when viewing against the sky.
Poor even for casual astronomy. Moon and [properly filtered] sun both soft and difficult to focus.

None of my videos nor stills through the Vortex will tolerate full screen even on a laptop. Many videos and stills taken with other maker's telescopes easily show the finest feather detail, full screen on my 55" 4K, Sony, OLED TV, via YouTube!

I had completely forgotten there was a 30 day limit on returns. It only seems like a fortnight that I have had it. Though I had to buy parts from several European countries to assemble a complete camera adapter. So the time has soon flown by.

Update: The UK dealer is arranging for home collection of the re-packaged telescope. Since we are self isolating that is a great relief!

A [Danish] bricks and mortar dealer took my money for home delivery of the Manfrotto tripod and video head. The wholesaler completely ignored this and sent it to a parcel pickup point in a shop. With all the attendant risks of infection for my age group! Not happy about that at all after two months of careful isolation! 


~~

Friday 29 May 2020

29.05.2020 Vixen 90mm v Vortex Razor 85mm. Pt.2.

 ~~

I tried both telescopes on the sun at 50x using the same Baader solar foil, full aperture filter. The Vixen was clearly superior with a much sharper limb. Just finding the sharpest focus was a struggle with the Vortex. I certainly wouldn't bother to use the Vortex Razor for white light, solar viewing. Not even at a very modest 50x. The Vixen will easily allow over 100x with a Baader solar foil filter.

Given the problems with the floppy, eyepiece, rubber ring and the very stiff zoom collar. Then the optical quality just doesn't match the considerable asking price of £1400! Quality control seems absent if this is an average example. I have read glowing reviews of Vortex online. Even comparisons made with the considerably more costly Swarovski and Kowa 'scopes of the same aperture.

Later: 6pm. 62F, still bright sunshine but the moon was high in the SE. I compared the Vortex Razor with the Vixen again at several different powers provided by Meade 4000 eyepieces. The Vixen won each time. Small craters were clearly visible in the Vixen 90. Even though the bright sky made for poor contrast conditions. The Vortex seemed veiled and soft.

7.30pm : Over an hour later and the Moon was beginning to be interesting in the Vixen. Though the sky was still blue and the sun sinking behind the trees. In the Vortex the moon was washed out by the sky. Just like a badly baffled telescope. Or one without any baffles or blackening inside the tubes. I have been building my own telescopes for 60 years. I know when there is a problem!

A shooting forum member told how delighted he was to be able to clearly see his bullet holes in paper targets at 500 yards with the Vortex Razor 85mm. So I pointed both scopes at brightly sunlit trees at 500 yards. The Vixen was the clear winner at all powers in identifying small bare twigs against the sky and leaf detail.

Online and YouTube reviews repeatedly mention it being difficult to tell the Vortex and the leading, European and Japanese models apart. Seriously? Based on what level of personal experience? If the Vortex Razor 85mm can't even trash an elderly and damaged, Vixen 90mm achromat at only 50x, then what sort of comparisons are we talking about?


~~

29.05.2020 Vixen 90mm v Vortex Razor 85mm. Pt.1.

~~

Friday 29th 58F in bright sunshine. The following images were taken with my Lumix TZ7. Not through any telescope.

I still have some doubts about the true optical quality of the Vortex Razor 85mm. Yes, the view is impressively bright and sharp at 27x but it certainly gets softer with increasing power on the zoom.

So I set up my decades old, 90mm f/11 Vixen refractor alongside it on another tripod. As before, my target was the same, printed A4 instruction sheet with normal and bold black text and some drawings. Now looking crumpled after being caught by the wind.

I fitted a Baader 1.25" erecting diagonal to the Vixen to give them both the same correct left/right/erect view. The nearest useful power I had in 1.25" eyepieces for the 1000mm Vixen was a 20mm for 50x. I tried a no-name Chinese Plossl first and then settled on a secondhand, Meade 4000 series Plossl.

I set up both telescopes as closely together as possible and at exactly the same eyepiece height. Though I tried hard, I could not quite make a binocular out of the eyepieces. Because the telescopes got in each other's way. The Vortex was set to 50x on the zoom ring and this closely matched the Vixen. I was very careful to check the size of the A4 matched as seen through both instruments.

First I tried the target at 24 meters. Again, but it was too close to clearly separate them on image quality. So I put the target A4 on its own tripod outside the gate at 38 meters.  This is my longest sunlit line of sight while the telescopes remain inside the garden. I considered sunshine important to have good light [and some partial shade from a hedge] on the target.

The difference in the image colour was obvious as far as the normal, white duplicating paper of the target A4 was concerned. The Vortex was colder white with just a hint of violet. The Vixen rendered the white paper in a slightly warmer tone but still white.

I was surprised how the sun was already causing heat waves in the image. So that the text was not continuously sharp. It was slightly easier to read the bold text in the Vixen. Which, strangely, seemed less perturbed by the heat currents.

The Vixen is an old, Japanese made achromat. With absolutely no pretensions to being ED or APO. It has only a "middling" focal length rather than a classical F:15. So it is not as well corrected for false colour as instruments with longer focal lengths.

Vixen achromats have a good reputation but that is all. Mine is old and battered. Bought secondhand, years ago. I have no idea as to its true age. The objective is dusty inside and out with a small flake/chip from an accident caused during cleaning years ago.

My eventual, 38m target distance was well chosen to make reading the normal sized text really difficult.  It took real concentration to read the smaller text as it went in and out of focus in the warmth. In both 'scopes the text looked more like magenta than the target's normal, printed, jet black. The Vixen won on contrast and legibility.


*


Thursday 28 May 2020

28.05.2020 How not to do digiscoping badly [again.]

~~

Thursday 28th 65F, a sunny day with light winds. After lunch I set off to cycle to the same lake as yesterday. This time I went straight to the tree-shaded, grass bank and set up near the picnic table. I am beginning to organize an efficient routine. The table was handy for laying everything out for easy access. It saved me having to have my binoculars hanging around my neck when I had only to reach over. A scan of the lake with my 8x42 Nikon Monarch 5 binoculars was useful. 

It allowed me to quickly assess most of the birds present. Two families of Shelducks, an Adult Great Crested Grebe and very pale juvenile. A second Grebe juvenile was fiercely chased away by the adult Grebe. One can only imagine the story behind this odd behaviour. It was repeated later but the unwanted juvenile did not retreat very far. It surely can't be due to a shortage of food in this very mature lake? The original pair of grebes spent most of their time preening out on the water. 

A large Heron moved at intervals between the bird nesting "furniture." Presumably nest boxes erected on posts by the owner of the lake. A heron is not the most exciting video subject due to its rather static pose for most of the time. Though It did offer some useful practice without having to constantly pan the telescope. Few water birds seem to stay still for very long. I do need to attend to the telescope's balance. Even with the dovetail plate fully moved to one end it is still tail heavy with the camera and adapter aboard.

The Shelducks are real tourists. Rarely holding still as they move around the lake. Then onto the bank at intervals, before soon setting off again. Their young are excellent paddlers even over longer distances.

I fooled the Canon battery into accepting a full charge this time. Every time the green light  on the charger came on I would lift the battery away from the contacts and then drop it back in again. The orange light came on for a few more minutes or just a few seconds before turning green again. It had no trouble holding out for an hour today. While I captured stills or video, without turning the camera off. I did notice that there was much less demand for auto-focus and centering today. The servo motors can usually be heard whining briefly during focusing and subject centering.

The lowest power, naked eyeball view through the Vortex Razor was sharp, bright and colourful. Not so much through the camera. I deliberately kept the camera zoom under half way and used the telescope zoom when I wanted more scale for a distant subject. Unfortunately, the Razor zoom ring is as foolishly stiff as the eyepiece, rubber ring is ridiculously loose and floppy. Neither is a good sign at this price level! Quality control is obviously not their greatest strength!

I will post some of today's videos once I have checked them properly and uploaded them. The wind was much lighter than yesterday. So I had a superb background of natural bird noises for most of the time. There were even warblers and Blue tits in the foliage just above my head.


~~


Wednesday 27 May 2020

27.05.2020 Grebe and Shelducks on another lake.


Another cycle ride to another lake on the far side of a small village. Unlike the last one, this mature lake was well furnished with full grown trees and cover on most sides. The owner came along while I was taking still pictures, through a gap in the trees, from the side of a quiet lane. He encouraged me to go closer along the grass bank.

The following video was partially successful but I still have much to learn about focusing accurately on the tiny camera screen. Panning and tilting requires great delicacy at the equivalent focal length of a digiscoping system!   

I was very lucky and concentrating on a solitary Grebe. Which was preening out in the middle of the lake. A Shelduck family had been for a tour and were returning to the far shore. When they passed just beyond the Grebe. My apologies for the wind noise. I am adding a calm, ambient soundtrack.


Another, shorter video of the Shelduck family having arrived on the far shore at 170 yards.

Obvious faults are:

Lack of uprightness. [Vortex Razor has a floppy, rubber, eyepiece ring which has no stability in rotation!

Shaky pan and tilt movement and telescope zooming at high magnification!!
Center and then leave the whole thing well alone!

Image quality and colours are almost acceptable considering the distance and magnification involved.


After taking about 80 stills and four short videos the Canon battery was dead again! My Panasonic TZ7 manages hundreds of stills and loads of videos without complaint between charges! The Canon battery was supplied with the camera, from new, so is very unlikely to be a fake. 

A "genuine" Canon replacement battery costs over £40 equivalent! "Pretend" batteries about £8. Duracell offer a replacement NB-4L but I won't touch them with a very long barge pole! 

Replacing the Canon battery means removing the camera from the Vortex PS-100 digiscoping adapter. Boring! I don't need this battery handicap while I am practicing my digiscoping skills! Or, rather, lack of them.

I saw a dirt cheap Ixus 117HS in the small adds complete with battery. Tempting!


~~

Sunday 24 May 2020

24.05.2020 Testing-testing..

~~

I thought it might be interesting to test the result of camera zoom on image quality. Sadly it was the same, heavy overcast as yesterday. Moreover I placed my test subject in the shade of a tree.

The test piece was an A4, black and white, crisply printed, illustrated guide to plumbing fittings. At 24 meters [26.25 yards] from the target the telescope was placed on its tripod.

Visually, I could easily read every word, at all powers. Just as if I was standing right in front of the target.

Then I attached the camera. Minimum camera zoom [5mm] caused vignetting. The dark corners only disappeared with increasing camera zoom.

Medium camera zoom [10mm] provided excellent sharpness and fine black and white images. Full camera zoom [20mm] produced violet print at all powers instead of black. This means that I must zoom the camera and telescope carefully according to my needs. 

Then I went back out again and retested at my maximum clear baseline of 56 meters [61 yards.] Hedges intervene on potentially longer lines of sight. It was windy outside the shelter of the garden so I had to peg the target firmly to the tripod. This caused some creasing. Visually I could read the bolder text at 60x but it rapidly became too small to read at lower telescope powers. It wasn't possible to read the normal text at this distance at any telescope power.

See applied image labels above for details of camera and telescope combinations.
All images reduced from 4000x3000 to 1000x750. [Left click for enlargements.]

Telescope's nominal power.......................................27, 40, 50 & 60x.  

Effect of camera zoom at 5, 10, 17 and 20mm:  Ixus 117 sensor is 11mm.
Camera focal length /sensor diagonal.                                                                                                                                             
  5/11 Reduces the telescope power by 0.45x..........12, 18, 22 & 27x.
10/11 Reduces the power by 0.9x............................24, 36, 45 & 54x.
17/11 Amplifies the power by 1.5x............................40, 60, 75 & 90x.
20/11 amplifies the telescope power by 1.8..............49, 72, 90 &108x!

The Ixus117 does not give actual figures for zoom on the camera screen. Just a slider and guesswork. The actual focal length has to be read off the details later. Which are provided by image cataloguing software like Google's Picasa. Microsoft's OneDrive Photos shows the basic details. Google Photos the same, under Info.


~~


24.05.2020 Thoughts on optical quality and digiscoping:

 ~~

Given that I am a beginner with the new kit, perhaps I am being too unkind to my Vortex Razor? Vortex has a good reputation but without the premium optics, premium price tag.

Their Razor 85mm is their top spotting scope model and by no means inexpensive. Mine is the later "improved model" with the large focusing collar around the body.

Yesterday's weather  conditions were certainly not ideal due to a lack of sunshine. Longer exposures in [relatively] dull conditions are the enemy of digiscoping because of the very high powers involved.

This can be directly related to very long telephoto lenses. In the 1000s of millimeters range! The slightest vibration can cause softening of the image. Long exposures will amplify any atmospheric effects like mirage and certainly won't freeze subject movement. The birds' feathers and the grass, water and trees were all in constant movement yesterday.

The 85mm Swarovski and Zeiss models are more than twice the price of the Vortex Razor! Is that the price one has to pay for true APO correction? Colour error and softness of the image are not nearly so noticeable when used visually. Even the experienced human eye is far more forgiving than a camera.

Though now I better understand why the "serious" people choose the top names in optics. The very high price is built on a potentially fragile reputation. It should guarantee the highest quality and the most stringent quality control. If it leaked out that there was "variability" the very high prices and advertising claims would begin to look like empty hype. The internet can spread rumours like wildfire!

The general view of the lake from where I was standing yesterday. I held back behind the nearest shrubbery to avoid startling the distant birds. 

As can be seen, a small field lay between the lake and myself. The cloudy sky is obvious too. 

That said, there are always unhappy customers who found better optics elsewhere. From makers like Kowa and Pentax and many others. They have returned the big names equipment as unsatisfactory at the very high asking price. I have read a lot of reviews and forum posts recently. Plus all the birding/hunting YT reviews of course. All in my search for affordable [within my own budget] digiscoping [afocal] equipment.

I can rely on my 60 years of astronomical, optical experience and photography to judge the value of personal opinions or commercial reviews. Many of which are just sales hype to move product. They use the same terms for all of the equipment they sell. Many of the terms are borrowed straight from the manufacturer's own [sales] websites. This doesn't help anybody make valid or useful comparisons.

Dimensioned photo of the lake for scale. The nearest point was 125 yards away.

I have been taking pictures though my astronomical equipment for many decades. Including birds , animals and landscapes. Digiscoping is not remotely new in that sense. It has always been done by amateur astronomers wanting more power. [Magnification] The technique even had a name: Afocal photography.

The arrival of the digital camera just made it far more popular and affordable for terrestrial subjects. Particularly as Asian optics spread prices for equipment steadily downwards to more affordable levels.

The enormous advantage of digital cameras [over film] is that you can take literally hundreds of trial images at no extra charge. Hopefully you learn more rapidly from your mistakes. With film the cost was so high that it severely limited how many exposures one was ever willing to take.

If you relied on the local chemist or camera shop for processing it could take a week to get your prints back. There was little chance to improve your skills by repetition or trial and error. With digital you can just keep pressing the shutter until you grow old and tired. Hopefully learning what works and what doesn't along the way.

~~

Saturday 23 May 2020

23.05.2020 Second digiscoping expedition. First video: A Shelduck family.

 ~~

Captured at 300 yards on the opposite bank of a small lake: Conditions overcast and windy. I was quite shocked at the considerable distances involved when I checked later using Google Earth.

I cycled the seven miles to the lake and was delighted with the comfort of the Viking Optical tripod S'port carrier/bag system. It was quite effortless and felt weightless on my back as I leaned naturally forwards onto the handlebars. The S'port tripod carrier system is a well thought out product with which I have yet to find any obvious fault. It easily manages to house my 85mm spotting telescope, zoom eyepiece, camera adapter, Lumix still camera in its case and my 8x42 Nikon binoculars.

The digiscoping [afocal] system includes a Vortex Razor 85mm, Canon IXUS117HS, Vortex PS-100, camera adapter, Manfrotto 055 tripod with Manfrotto 500 "fluid" video  head.  

https://youtu.be/8a5zKkE7j4s


I was very pleased with the steadiness of the Manfrotto tripod and head. It really is a class product!

I am really rather disappointed with the optical quality of my stills and videos. Perhaps it would be have been different on a sunny day with much shorter exposures or "slower" focal ratios? I used the 2 second, self timer for both stills and videos. I didn't record which still images I "snapped" without the timer.

I'm still struggling with framing, focusing and monitoring on the small camera screen even with my strongest reading glasses. [+1.5 to my normal +1] I really do need a magnifying glass to use this small screen to best effect.

The looseness of the Vortex Razor, rubber eyepiece ring [spectacle] is a real pain! I was having to constantly monitor the uprightness of the image on the small camera screen and mostly failing to do it correctly. The human eye does not expect to see sloping water in images!

I have to admit to being disappointed with the optical quality of the Vortex Razor. Violet, chromatic aberration showing strongly around white objects like swans and Shelducks in both stills and video! Look at the violet overlay on the backs of the Shelducks! Is this real?

Still image [right] captured at 17/20mm zoom. 1/80 sec at f5.6. 17/20 is close to maximum zoom on the little Canon compact. This was needed to completely remove the black corners due to vignetting.

Unfortunately I have no record of the degree of zoom used on the 'scope itself. I was experimenting quite a lot with zoom to see if it made much difference to the optical colour correction and sharpness of the image. Rather pointlessly since I could not separate the final zoomed images.

After considerable searching online, I finally found an answer to the amplification factor of the camera. Thanks must go to a helpful and knowledgeable person on a forum:

Camera amplification of the telescope's own magnification:

The focal length of the camera lens / the sensor diagonal [both in mm.]

My little Canon Ixus 117HS has a maximum focal length of 20mm at full zoom. Its sensor diagonal is 11mm. 20/11 = 1.8. So the telescope's minimum 27x 1.8 becomes 48.6x system magnification at maximum camera zoom. And so on, up through the telescope's own zoom range of 27-60x.

But, then I saw a focal length of 17mm registered against most of today's still image specs: This is independent of the telescope zoom which cannot be recorded by today's clever, digital technology.

17/11[mm] = 1.5.  So 27x 1.5 = 40x. 30x 1.5 = 45. 40x 1,5 = 60x. 50 x 1.5 = 75. 60 x 1.5 = 90x!


~~

Friday 22 May 2020

22.05.2020 Centering collar for the digiscoping camera lens.

*

Friday 22nd May overcast with light rain: Removing the camera from the Vortex digiscoping adapter means careful realignment every single time the camera is fixed back on. This is true of all base plate type adapters for cameras without filter threads on the camera lens.

You can't cheat somehow and leave the camera on there permanently. Because you can't [usually] remove the battery to place it in the supplied charger. The slotted, camera base plate completely prevents removal. Unless, of course, you cut away the base plate locally to allow the little battery door to be accessed and opened. That may not leave you enough material to support the camera properly.

It follows that digiscoping is best applied to cameras with a threaded "nose" to their lenses. This would allow instant alignment every single time it was placed on the telescope eyepiece. Without all the "fuss" of re-aligning a base plate type adapter.

Some short zoom, compact, digital cameras do have these filter threads, but by no means all. You may wish to purchase a camera better suited to digiscoping using a threaded lens adapter. Rather than using one of those horrible and hideously clumsy "universal" digiscoping adapters. I bought one of those first and soon gave it up as completely hopeless.

Since I was being forced to remove my own camera, so often, I thought I ought to seriously consider all other alternatives. A new camera would certainly be the most expensive option and was discounted for the moment. I needed a far more affordable idea after my considerable expenditure on the tripod and telescope!

It occurred to me that I could more easily center the camera lens in the PS-100 digiscoping adapter. All I needed was a suitable, tubular collar. One which fitted the outside of camera lens base when it was switched on and the lens protruding as normal.

Meanwhile, the outside of the collar must fit closely, but  not tightly, inside the 37mm, threaded hole in the Vortex adapter's, adjustable, front plate. BTW: A 50mm threaded version of the front plate is still available from some Vortex stockists if that helps with your own particular camera.

By the most amazing coincidence I had some white, PVC, plumping pipe hanging around. This was of exactly the correct size both inside and out. Plastic has the distinct advantage of not cosmetically damaging the camera or the adapter. Metal almost certainly would cause damage! So be warned!

I cut a short length off the pipe and carefully smoothed it inside and out with sandpaper. This was important to avoid any burrs from catching on the delicate camera lens housing. A free fit is far more desirable than tight! If you have a tight fit the camera will probably malfunction or might even be damaged! Consider yourself doubly warned! Don't blame the messenger for your own clumsiness and/or idiocy!

Now I just needed to slacken off the clamping screw at the base of  the front mounting plate of the Vortex PS-100 digiscoping, camera adapter.

Once it was loose enough I slipped the piece of white pipe through the hole in the front plate and over the protruding camera lens base. I had to be very careful that the camera was square to the adapter. Or the centering pipe would be at an angle. It might even do serious damage by causing the lens to jam inside the collar!

Once I was happy with the fit and squareness I could tighten the [front plate] clamping bolt. A far easier method of aligning the camera than judging it by eye.  When I first switched on the camera I was greeted by a slightly offset bright circle on the camera screen. Some more fiddling produced a more centralized image on the camera screen.

It would seem that it would be best to check the camera's focusing screen during final alignment on the telescope. The stub of white pipe still helps a lot. Because it doesn't allow the front plate to move very far. Without it, the front plate slides all over the place. So you can only judge the centering by eye! 

Now it just required that I zoom enough to lose the dark corners [vignetting.]  Then I set the self-timer to 2 seconds and took some pictures through the system. Not an ideal day because it was anything but bright. I was down to 1/80th of a second exposure at f5.6. Which does not protect the images much from movement. Neither the camera itself moving nor the subject. [Both?] The tree shown in the image here was moving in the wind.

The other day, in bright sunshine, I was getting 1/1000 second. Sunshine is usually desirable for a crisp and interesting image. Though overcast skies have the advantage of very even lighting. With much less risk of burnt out highlights and very dark shadows.

The DIY alignment collar provides a bright image circle in the camera screen. So camera alignment can take place even without the telescope. See images above. The red arrow shows sideways misalignment of the image circle. The "up and down" adjustment isn't too bad. The length of the alignment collar affects the diameter of the bright circle you see on the camera screen. 

Some fine adjustment might be possible, or even necessary, on the telescope. This will depend on the fit of your eyepiece adapter clamping ring.

I had fitted the medium thickness, self adhesive, rubber packing material supplied with my Telescope-Service camera adapter. This provided a nice but not tight fit on the Vortex eyepiece rubber. The four, clamping, thumbscrews cause some slight change in alignment on the rubber eyepiece ring when tightened.

*


Saturday 16 May 2020

First expedition. Vital Lessons Learned: Pt.2

~~

Continuing: The Manfrotto head and tripod legs are superb. Rock solid in the very gusty wind. Even with the Viking tripod carrying bag in place. Very pleased with this setup. Though the dovetail, locking, "wing" screw on the head is vulnerable to being lost if it unscrews. I am not sure it is captive.

I had problems seeing the small camera screen well enough to focus sharply. Not helped by the sky reflecting off the sloping screen So this was one of the very few acceptable images I captured today. This tangle of branches is about 120-130 yards away across the marsh pond. 

 Focusing using the small screen on the Canon camera is really quite difficult. I should have taken my strongest reading/ fine repair work glasses. I keep these only for the closest work in the workshop. They will be vitally necessary for accurate focusing in future! A square magnifying glass on a lanyard might be rather more useful. Removing one's spectacles to quickly use the binos. Then back to the telescope, or camera, is always a bore. Best avoided! Specs on watchmakers or librarian's lanyards are similarly irritating. I've tried them. A square magnifying glass with a deep, black frame for shielding the camera screen against the sky/sun light would be good.  

Check the battery on your Canon camera before leaving for a digiscoping trip! It was recharged in the week and is already flat after only a few trial shots though the telescope at home! The Panasonic Lumix batteries seem to hold their charge forever even with my usual, heavy, daily use. The Canon problem might be the servo motors I hear when the camera is re-focusing and centering a subject. I can try turning these off.

The Manfrotto long plate has to be fitted the correct way around in the dovetail of the 500 head. It cannot be reversed or it simply won't drop in. Nor lock safely and automatically in place. I had removed the dovetail plate to be able to better fit the telescope in the zipped pouch. I shall leave it in place in future. There is plenty of room for the telescope to be turned inside the zipped pouch and no sense of anything sticking into my back while walking.

The eyepiece clamping thumbscrews of the telescope adapter ring I had bought from Germany were incredibly vulnerable to unscrewing themselves! So they could easily be lost in the grass.  I found three of them in the bottom of the zipped pocket on the Viking tripod carrier. Huge sigh of relief! Quite what I can do about it is another matter. Silicone rubber on the thumbscrew threads inside the ring?  That, or I will have to drill the thumbscrews and fit tiny lanyards! No!

Beech forest at 1,800 yards. Distance measured on Google Earth.

The camera had been removed from the Vortex PS-100 before being refitted for the short trip. Even though the front plate clamping bolt hadn't been undone the camera alignment was still horribly awry! The camera may have to be left permanently in place on the PS-100 adapter once it is perfectly aligned. My wife will lose her occasional camera for snapping flowers and butterflies. Buy a duplicate camera or a short zoom camera with a much larger screen? More expense!

The retractable Vortex Razor eyepiece [spectacle] ring is far too lose! Once clamped in place on the rubber ring the camera rotates back and forth completely freely. I could remove the packing inside the telescope adapter ring and clamp directly to the metalwork of the Razor eyepiece. Not too happy about that. I shall have to give the sloppiness of the eyepiece ring some serious thought. Add some tape inside the retractable rubber ring? This needs serious attention!

The battery compartment is inaccessible when the camera is fitted onto the Vortex PS-100 adapter. Which means re-aligning the camera every time it is used! Eek!  I had already fitted location screws in the free slots to constrain the camera but they didn't seem to help all that much.

The Vortex Razor, cheap, plastic lens caps are garbage. They don't grip and won't stay in place beyond a second or two. Not sure how I'm going to protect the eyepiece and its vulnerable orifice in the telescope body in the future. A thick sock? Or two thick woolly socks? Makes much better sense than the plastic caps which don't stay on. So don't do any good at all! 

~~

First expedition. Vital lessons learned. Pt.1.

~~

Saturday morning, 50F, overcast and windy from the west. 

I loaded up all my digiscoping gear and plodded off down the drive. I was certainly aware that I had added 13lbs or 6+ kg to my usual load of camera and binoculars. It didn't feel too bad on my shoulders but my footfalls were obviously heavier. I wore my walking boots as usual because I intended to go off road once I reached my exit. 

Three quarters of a mile later and I was standing on the spray tracks and facing the marsh pond. Lots of different warblers, a cuckoo and a dozen swallows were providing the entertainment.

No sign of any ducks, herons, coots or grebes! Last year there were over one hundred young and adult mallards on the water. Plus an assortment of different ducks and other water birds. 

I found it very easy to drop the two legs of the Manfrotto tripod before removing the pack. The leg latches are very easy to reach and use. The upper leg sections slide out smoothly.

The lower sections are more reluctant to drop naturally due to having much less weight for gravity to work on but are nicely smooth. Remember to drop the lower sections first while the latches can still be easily reached! Duly noted for the future.

Lessons learned: The Vortex Razor "stay on" bag/case is absolute garbage. I knew this already but had fitted it to protect the telescope on my first proper, outdoor trial. It will be removed in future and hurled as far across the garden as I can possibly manage. To become a habitat for whatever wildlife takes its fancy. It would be a grave disservice to any buyer if I advertised it for sale. Garbage belongs in the garbage can.

With the "stay-on" bag fitted it is IMPOSSIBLE to unlock or lock the eyepiece in the telescope body. Garbage design! The eyepiece locking ring is stiff to turn, tapered and curved, smooth plastic. So already difficult to grip to be able to turn it. Very poor design without a single thought being put into the final compromise for the user! 

Extending or fully retracting the objective shield is near impossible with the "stay on" bag in place! Another good reason for leaving the garbage bag at home. Though that raises the difficulty of using the horrible rubber lens plug. More garbage! This thick rubber disk weighs about a pound and is very difficult to fit or remove. More garbage!

I shall use only the elasticated, padded "nosebag" of the "stay-on" bag to protect the objective in future! Difficult as it is to fit. I just checked and the plastic buckles on the "nosebag" elastic straps can easily get trapped between the padding and the precious objective lens! I'm definitely going over to fitting socks over the lenses! And now have.


~~

Friday 15 May 2020

The negative consequences of higher optical power. [System magnification!]

 ~~

The higher the overall power [magnification] of your system the shallower the field of [sharp] view. This is a direct consequence of the equivalent focal length of the entire optical system. This demands you focus very carefully only on the subject which interests you.

Better a really sharp bird, or deer, against a softly focused background than vice versa! I was really shocked by this depth of field factor in my spotting 'scope despite my years of looking at terrestrial subjects though my various astronomical telescopes. A twig behind the one I focused on and the one in front of it, were both out of focus. Wind movement of a tree changed the point of sharpest focus. You see this same effect in images taken with long telephoto lenses. Photographers will deliberately use a longer lens and wider aperture to throw the background out of focus.

The field of view darkens to match the sheer power of the combined optical system. Larger aperture telescopes score better here. By providing enough light to capture an image at dusk or dawn. Or when the subject is in shadow. Smaller apertures may struggle under overcast conditions. Though the smaller telescope will be lighter and easier to carry to where you can capture your subject matter. The more light you can muster the shorter the exposure. Think about that as you read the last paragraph.

The field of view shrinks rapidly with increasing power. Handy if you want to capture a solitary subject. Less so if a distant flock or herd interests you. Worse if the subject is a bird flitting about foraging rather than static and singing. Which of a flock will you choose to focus on? At the cost of others having bits chopped off by the limited field of view. You may gain more by lowering the overall power and then carefully cropping the image later.

The higher the power the more that optical aberrations of the system are emphasized and misalignment exaggerated. Unless you have perfect optics and perfect alignment of the camera on the telescope the view may become softer. It might be tempting to use higher powers from a greater distance but you may get better results  by being closer and using lower powers. Even if it means walking further.

The physical demands in supporting the telescope and camera combination rigidly during an exposure becomes ever more critical as the power rises. This can be overcome to some extent by using the camera's self timer. Short zoom, compact digital cameras may not offer remote release. Though advances in electronics or more sophisticated cameras may provide this feature.  

Hopefully the usual 2 seconds delay will be enough for your chosen tripod to settle from your last touching the camera release button to set off the timer. A longer delay must be balanced against changing conditions and the bird having flown.

Another alternative is to use burst mode. That is taking a short burst of many exposures. You may capture an instant where vibrations were least annoying. Or the subject was most alluring. Wind is always a problem and will try to move the camera just when your subject is perfectly arranged in your camera's viewfinder screen. If the tree sways you may miss the tree let alone the bird.

It obviously pays to keep the magnification to the minimum you need to capture your subject at a reasonable scale. You gain all around. Greater depth of field. Larger field of view. More light to brighten your image and lower sensitivity to camera movement. Plus ++++ you shorten the exposure to freeze the image and kill any camera shake.

A very rough guide to magnification is to divide the focal length by 50. A 50mm lens on a 35mm camera is about normal 1:1 human sight. Or, you can multiply the magnification by 50 to get the equivalent focal length.

Lowest power = 27 x 50 = 1350mm! Zoom x2 and 50 x 50= 2500mm! Imagine handling a telephoto lens of that huge length in the woods or by the lake! It would require a massive support not to shake in the wind and would be totally impractical to carry around.

Now you know why you need to match your support to the magnification of your much smaller but highly magnifying digiscoping set-up. And why you should try to keep your system's magnification to a minimum.

~~

Camera alignment on the telescope for digiscoping.

~~

When a camera is first attached to the telescope it should be adjusted to be as close as possible to the eyepiece. Though the camera lens housing shouldn't actually touch the eye lens. Camera zoom lenses move in and out as they zoom and focus. The extreme length should just clear the eyepiece. Not actually touch it.

Do not attempt centering of the image until you are satisfied the camera lens will not hit the telescope eyepiece during zooming. Nor should you attempt to zoom to expand the dark corners out of sight on the camera screen. Use the lowest power on the telescope if it has a zoom ring.

A short, camera zoom lens will move in and out less than a super zoom. Though its [normally] free movement should not be blocked or impeded by the telescope. Actual contact is likely to produce an error notice from the camera. They are simply not designed to cope with this sort of problem. Nor do you want to damage the expensive eyepiece lens by crushing dust or dirt between the approachig surfaces.

The usual first view in the camera's viewing screen is of a bright circle with black corners. Whether the bright circle is centered on the screen will depend on the accuracy of the camera's fitting to the telescope adapter.

Trees at assorted distances over 450 yards away.

Adjustment is usually provided for back and forth, height and side to side movement. The telescope stays still. The camera is adjusted on its adapter to center its own lens on the telescope's eye lens. The viewing screen is useful for monitoring the exact alignment.

The problem is usually that adjusting involves loosening something. Which undoes any former adjustments. The Vortex PS-100 has a front plate which bolts to the slotted, L-section, camera support plate. A slot is provided in the front plate for the bolt to move up and down.

Rotation of the adapter front plate provides some side to side movement. Simultaneously with height adjustment. If that sounds fiddly, it certainly is. Patience and not torquing the fixing bolt too tightly is required. I added a thin washer beneath the hex, socket head bolt to allow smoother adjustment. Only when I was satisfied with centering did I properly tighten the bolt. I then carefully checked the camera's nose clearance from the telescope at all zoom settings.

If you cheat and zoom in to remove the dark corners, before the camera is properly aligned, you may get distorted pictures, false colours or shadows in your images. Patience will be rewarded so don't give up too soon. The Larch tree in my images was about 30 yards away. Zooming to remove the dark corners adds magnification to the power of the telescope. This is inevitable but not always desirable. See the next post on the subject of power in more detail.

~~

Viking Optical Tripod S'port Pt.2.

~~

What I haven't shown [yet] is that the pack usually remains on the tripod in use. It does not impede the tripod when the legs are extended and spread wide. So that the whole unit works exactly like a "naked" tripod. The "bag" for want of a better term is made of sturdy cloth and the zips are typically modern plastic and seem like good quality. They slide open and closed smoothly as expected.

The hanging bag unit will increase wind resistance compared with a naked tripod. Though the whole tripod [and hanging bag] can then be rotated to minimize its area as presented to the prevailing wind. [i.e. Edge on to the wind.]

The tripod is probably best set up at full, normal height. Before the telescope in its zipped storage pouch is removed and fitted onto the head. This method will save grovelling on the damp ground. Since you an work at a comfortable height on a stable platform.

Somewhat surprisingly [for me] is that I haven't found any obvious flaws with this Viking tripod carrying system yet. Normally I start thinking about modification [or improvements] the moment a new item arrives in the post. The real proof of its true practicality will be in its actual use.

I am very pleased that I found less bulky, lighter and more practical way of carrying my big Manfrotto tripod into the wilds. I really don't think I could have put up with a real rucksack. With the tripod probably dangling form its side or strapped across the top. With the Viking S'port tripod carrying system the cloth always stays well off the ground. Nor do I need to crouch on one wet knee to access the contents. I just slip off the bag, loosen the clamps and let the tripod legs extend. What could possibly go wrong?  


~~

Yo-oh-heave-ho! The Viking Optical Tripod S'port MkII.

~~

Having accumulated all my bits and pieces I needed a way to drag it all around with me. My daily, rural walk are often over rough ground and only rarely on the flat. I climb up and down precipitous fire breaks. Often covered in brambles and furnished with twigs and branches usually just left lying where they fell from the jaws of the forestry harvesters.

I spent fruitless hours searching online for a suitable ruck sack. The main problem was carrying the long and fairly hefty tripod. I tried a couple of borrowed shoulder straps and liked that a lot better than a single one slung diagonally. So it would have to be a rucksack or something like it. Except that I neither wanted a rucksack nor needed one for my limited load.

Normally I am wearing a jacket with several pockets for my walks. TZ7 camera in the left front, hip pocket. Mobile phone inside left breast pocket. Tissues and reading glasses in my right hip pocket. Nikon 8x42 Monarch binoculars on my chest. Suspended from its short and modified strap around my neck. 

I looked at hundreds of rucksacks and camera bags. Nothing really jumped out at me. Nothing said "Burn more plastic!"  I returned to searching. The bird forums were discussing "Mule" packs and "Scope" bags and eventually the Viking Optical S'port tripod carrier.  This is a hybrid pouch which uses the tripod as its "rucksack" style frame. Clever. I liked that idea. The more cloth a bag has the heavier it becomes. They always want to cover them in pockets.

The S'port housed a central bag or pouch with pockets on the backside. The downside was that the online promotional video was of a black bag against a dark green jacket filmed on a horribly overcast day. Even when it wasn't being worn by the demonstrator the dark ground did it no favours. [I have deliberately lightened my images of the Viking S'port to bring out the detail.]

My most important question was whether the main storage pouch could manage hold my hefty, 85mm telescope? Rather than  wearing the 'scope mounted on the tripod head and turned across the wearer's shoulders. I decided it would. Or it could be modified somehow to do so.

I certainly wasn't happy about stumbling around in the forest carrying a modern day cross on my back! I placed my order with Viking in the UK and it took only a couple of days to arrive here in Denmark. I considered the modest £50 asking price [plus postage] to be perfectly acceptable if the quality matched the online images. You can pay hundreds for a telescope or camera bag if it has the desirable, "designer label!"

Thankfully the telescope fitted easily, but snugly into the main pouch and I am happy with my purchase so far. Though I have only trundled around the garden while wearing the whole "kit and caboodle" as a first test.

The arrangement of the telescope in the zipped storage compartment is vital for wearer comfort. The flattest possible arrangement is desirable to avoid lumps or sharp corners projecting into the wearer's back. Fortunately there was room for the telescope to be rotated into the best position for comfort. A flat board might be an idea to line the pouch where it rests against the wearer's back. We shall have to see how well the telescope rests in its "foetal position."

I removed the Vortex zoom eyepiece to aid stuffing/stowing it all away. It will be safely housed in its own, padded, "stay-on" case/bag for protection. As is the Vortex telescope's stay on bag  for the moment

The Vortex PS-100 camera adapter fits easily into the zipped, back pocket. I have plans to trim away most of the slotted camera plate. Or replace it with a simpler, aluminium angle profile. Though I will need to make a threaded hole for the front plate's, clamping bolt. No problem in that.

Note how the video head has been tilted well away from my head and locked securely in place. With the "joystick" turned down and locked alongside the central column.

Three wide, Velcro straps are provided for securing each leg to the "bag." The strap at the top is buckled and fits just below the head as the main securing method. The tension can be adjusted on the strap to allow the bag to fit tightly against the wearer's back. Or looser, to lean the whole pack away from them. Only the user can decide what works best for them in practice.

A further strap around the tripod's central pillar helps the cause of stability. For a load which does not jiggle or irritate the wearer in use. The two tripod legs, which act as the rucksack frame, can be spread wider. Or closed up together for best wearer comfort to personal taste. The legs pass the wearer's hips and the whole set-up feels very comfortable.

The third tripod leg, projecting at the back of the pack, provides instant [tripod] support when the wearer takes the pack off. When the pack is worn the leg lies flat against the pack. I found the shoulder straps worked fine at their shortest length. I'm about 5'10" and average build. A fully adjustable, waist band with modern, plastic, snap-in buckle provides the final touch for stability in use. The belt is long enough for a "beer belly" if required. I kept shortening it until it was snug.


~~